Materials:
Spare binder (9" high by 3" thick) or the size of your choice)
3 sheets of matching scrapbook paper
Clear rubber stamp letters, an acrylic block, and ink
about 3 feet of ribbon (optional)
hot glue gun
large glue stick (you will need a lot!)
ziplock bags
hole punch
heavy book (optional)
Sharpie Marker
To begin, I turned my plastic baggies so that the zipper size was on the right. I used my Crop-a-dile II to punch holes about 1 inch in on the left side of the bag (the bottom, actually, but since the zipper is on the right I'm calling it the left), if that makes sense.
Next, I labeled my bags with a sharpie, in large, black numbers. It was actually easier to punch holes in the bags after I put the needles in them, because they helped to align the front and back sides of the bag for even holes.
Next, I glued my scrapbook paper over the ugly brown cover. First glue the back cover page like this:
Next, I folded the right side in and glued it down. You need to coat that baby in glue stick! A bone folder would work well in this instance, but I don't have one so I just tried to do a straight fold. Next, I folded the corners down before I glued down the top and bottom.
So now you should have this:
Next, you will do this with the front cover side, but when you align the scrapbook paper up with the binder, make sure the edge of the paper is at the edge of the back cover crease. This will make for a (somewhat) cleaner book spine that people will see when this sits on your bookshelf.
Fold and glue the edges as done on the opposite side. At this point, I was looking at the inside of the book and decided I needed to cover the ugly brown on the inside as well. I just cut pieces of scrapbook paper to cover the inside of the covers and glued it down. Don't ask me for measurements; I eyeball everything!
At this point you will want to set a heavy book on your front and back covers (while the binder is lying open), so that the glue can properly dry. Once it is dry, arrange your lettering on your stamp block:
You know what to do now:
Notice the line on the left side of the spine. I tried (unsuccessfully) to hot glue this down better, with little success and a lot of glue burns.
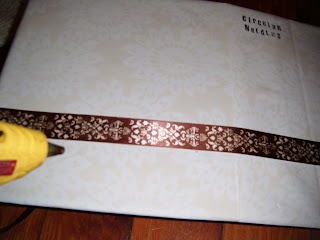
I decided that the binder needed more decor, so I added a length of satin ribbon across the bottom. Start by gluing the center of the ribbon by a small dot in the middle of the spine. Draw a line from the outside edge back to the center with a ruler, and put glue over the line. Holding the ribbon taut, gently lay the ribbon onto the glue and pat it down. do NOT slide it, or you will end up wasting a section of expensive ribbon because it will get "wavy." Rinse and repeat. If you did it right, it should look like this:
And on the inside, it should look like this:
Now, since I made this cover with the binder lying flat (no wrinkles!), I had to set a book on it to get it to stay closed. Let a heavy book sit on it overnight and you will wake up to beautifully organized circular knitting needles!


Neat idea. I have something similar, I didn't cover my binder. I have gotten to where I leave my circulars in the packaging from the store and just place them according to size in my binder.
ReplyDelete